
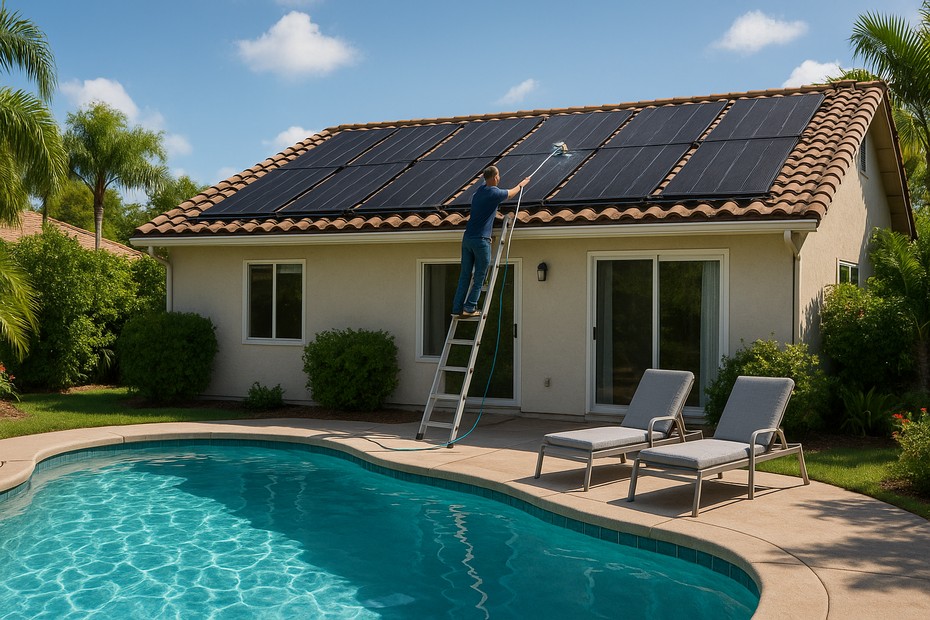
Keeping a solar‑powered pool heater in good shape is as much about enjoying a comfortable swim season as it is about protecting your investment. Solar collectors, pumps, valves, sensors and piping all need care. While solar pool heaters have few moving parts, they’re exposed to water, debris, sunlight and weather for many months of the year, and lack of attention can shorten their service life or reduce performance. This comprehensive guide walks you through what to inspect, how often to service each component, and why each task matters so you can keep your system running smoothly.
Why regular maintenance matters
Solar pool heaters use rooftop or ground‑mounted panels to collect heat from the sun and transfer it to your pool water. In most systems, filtered water is pumped through the collectors and then returned to the pool. These systems are durable and have long lifespans, yet they still require periodic inspection and care. Dirty panels, clogged filters or leaking pipes reduce efficiency and raise energy costs. Regular maintenance helps you catch minor issues before they become expensive repairs and extends the system’s life by several years. With proper care, a quality solar pool heater can last 15–20 years.
Key components of a solar pool heater
A typical solar pool heating system includes:
- Solar collectors or panels – unglazed polypropylene mats or glazed evacuated‑tube panels that absorb solar heat. They’re mounted on roofs or racks and connected to the pool’s circulation system.
- Pumps and plumbing – a pump circulates pool water through the collectors. Piping, valves and fittings control the flow.
- Flow control valve – a diverter valve that sends water to the solar collectors when heat is needed and bypasses them when the pool is already warm.
- Controllers and sensors – temperature sensors on the collector and pool and an electronic controller decide when to run the pump. Pressure gauges or flow meters help monitor performance.
Understanding these components makes it easier to diagnose problems and schedule maintenance.
Annual maintenance tasks
1. Inspect for shading and soiling
Solar collectors perform best when they receive unobstructed sunlight. At least once a year, visually check the panels for shading from new tree growth, nearby construction or a shifted mounting position. Remove any branches that cast shade.
Dirty collectors reduce efficiency; dusty or soiled panels may require periodic cleaning. Rain rinses off light dirt but pollen, bird droppings and leaf debris accumulate over time. A guideline from Northern Lights Solar Solutions suggests basic cleaning around the collectors monthly, deeper cleaning quarterly and a professional inspection annually. In areas with heavy dust or tree debris, some installers recommend quarterly cleaning to maintain peak performance.
2. Clean the collectors correctly
Cleaning panels is not complicated but must be done carefully to avoid damaging them. Follow these steps:
- Turn off the system – shut down the pool pump and any control system. Allow the panels to cool, then use a sturdy ladder to reach roof‑mounted collectors safely.
- Remove debris – gently sweep off leaves, twigs and dirt with a soft brush or leaf blower to avoid scratching the surface. For unglazed polypropylene mats, a hose with mild pressure can rinse off loose grime.
- Rinse and wipe – rinse panels with a garden hose from top to bottom to remove dirt. For glazed collectors, use a soft sponge or microfiber cloth and a mild soap solution to clean away stubborn dust. Avoid harsh chemicals or abrasive cleaners—citric‑acid solutions or diluted vinegar work for mineral deposits.
- Inspect and protect – check for cracks, leaks, or yellowed glazing. Ensure all bolts and clamps are tight. Inspect roof penetrations for signs of water leaks.
- Check connections – examine pipe joints and fittings for leaks or corrosion, and re‑seal if necessary.
Additional cleaning tips:
- Never use high‑pressure washers or abrasive pads, which can damage panel coatings.
- Work during cooler hours to prevent soap drying too quickly and leaving streaks.
- Keep your pool water balanced; a clean pool reduces debris on panels.
3. Inspect and clean filters
Solar pool heaters rely on clean pool water circulating through the collectors. Dirty pool filters restrict flow and reduce heating efficiency. Sunlover Heating advises checking the filter first if the system seems underperforming. Regularly backwash or replace the filter cartridge per the manufacturer’s recommendations and ensure water flow sensors and pressure gauges are operating correctly.
4. Check pumps and motor operation
Verify that pumps or blowers turn on when the sun is shining and the pool requires heat. Listen for unusual noises or vibrations; a squealing sound may indicate a failing pump bearing or impeller. If the pump runs at night or fails to start, a sensor or controller could be malfunctioning.
Pumps and fans often use capacitors that degrade over time; replacing a capacitor can restore operation without replacing the entire pump. Most systems circulate 10–15 gallons per minute per panel bank, so ensure that pump sizing and flow rates remain within the recommended range.
5. Inspect flow control valves
Flow valves regulate how quickly water moves through the panels. Valves need to open and close fully to ensure the water spends enough time in the collectors to absorb heat but not so long that flow stagnates. The Thermopools maintenance guide explains that water flow valves should allow cool pool water to be replaced by warm water at the most favourable pace; malfunctioning valves may lead to uneven heating. Each season, move the valve through its full range of motion to prevent sticking, lubricate stems if required and replace any worn seals or O‑rings.
6. Inspect sensors and controllers
Automatic solar controllers use temperature sensors to decide when to turn pumps on or off. A typical setup includes a sensor on the collector outlet and another at the bottom of the solar storage tank or pool. If the pump runs at the wrong time, check that the collector sensor isn’t short‑circuited and the tank sensor isn’t open‑circuited. Compare resistance readings against the manufacturer’s specifications; sensors should be fastened securely to avoid falling off.
7. Examine seals, insulation and roof penetrations
Solar pool heaters use many O‑rings, gaskets and seals to prevent leaks. Inspect these at least yearly. Look for cracks or signs of deterioration on collector glazing and replace yellowed or brittle plastic. Check pipes, ducts and wiring insulation for damage; protect exposed wiring in conduits and replace worn insulation. Maintain flashing and sealant around roof penetrations to prevent water intrusion. Tighten support structure bolts and watch for corrosion on metal brackets.
8. Look for pressure relief valves and dampers
Liquid‑based solar heating collectors typically include a pressure relief valve. Lift the lever annually to ensure it isn’t stuck open or closed. In solar air heating systems (less common for pools), confirm that dampers open and close properly.
9. Flush the system and check for scale or corrosion
Over time, minerals from hard water can build up inside collectors and piping. Scale reduces heat transfer and may cause valve and pump failures. The U.S. Department of Energy recommends flushing the collector and domestic hot water loop with a mild acidic solution (e.g., vinegar or citric acid) every 3–5 years. In solar pool heaters that use only water as the heat‑transfer fluid (most pool systems), scale buildup can be controlled by keeping pool chemistry balanced and occasionally circulating diluted vinegar through the collectors.
Corrosion is less common but can occur when dissimilar metals contact each other, causing galvanic corrosion. Use dielectric unions between copper pipes and steel storage tanks and ensure that tank linings are intact. In open‑loop systems, oxygen can cause rust; using corrosion‑resistant materials like copper, bronze or stainless steel helps prevent this.
10. Protect against freezing
Freeze damage can crack pipes or collectors. The Department of Energy notes two primary options for freeze protection: using an antifreeze solution (e.g., propylene glycol) in the collector loop or draining the collectors when the temperature drops below the freezing point of water. Pool heaters typically use drainback systems; sensors detect low temperatures and automatically drain the loop into a holding tank. Check freeze sensors annually and ensure they’re installed correctly.
If your system uses an antifreeze solution, ask a solar professional to test and change the propylene glycol every 3–5 years. Never use ethylene glycol because of toxicity. Antifreeze can degrade over time and must be maintained at the proper concentration.
11. Avoid overheating
If the pool pump is off but the collectors keep heating, the system can overheat. Overheating leads to pressure relief valve discharge and premature degradation of antifreeze. Controllers usually shut off the pump when the storage tank temperature hits an upper limit (often 180 °F). To prevent damage, ensure sensors are correctly calibrated and that a drainback tank or solenoid valve is installed to release fluid if overheating occurs.
12. Verify slope and drainage
Collectors and piping in drainback systems must slope properly (at least 0.25 inches per foot) to allow water to drain completely. Air vents at the highest point in the loop prevent vacuum formation. Check that nothing blocks air vents and that insulation around vents prevents freezing. In integral collector storage (batch) systems, insulating unglazed parts of the collector at night or covering glazing on cloudy days helps prevent freezing. In very cold climates, draining the entire system before freezing temperatures is the safest option.
13. Schedule professional inspections
Annual inspections by a qualified technician provide peace of mind. Professionals use thermal imaging to identify cold spots or leaks, pressure gauges to detect blockages, flow meters to verify circulation rates and visual inspections to check for damaged seals or degraded panels. They also calibrate controllers, test sensors and ensure that diverter valves open at the correct temperature differential (often 4 °C). Many companies offer service plans that include annual cleaning and mid‑year tune‑ups. Although professional maintenance costs around US $100–200 per year, the energy savings and extended system life make it worthwhile.
14. Check support structures and roof attachments
Solar collectors weigh significant amounts, especially when filled with water. Inspect roof support brackets, bolts and mounting rails for corrosion or loosening. Tighten any loose hardware and touch up paint on steel parts to prevent rust. Replace any cracked or damaged mounting hardware promptly. If panels are ground‑mounted, ensure the rack is stable, level and free of vegetation that could compromise its structural integrity.
15. Monitor system performance
Keep an eye on how quickly your pool heats after starting the pump. Signs of reduced efficiency include longer heating cycles, uneven collector temperatures, higher pump runtime or visible scale on panels. If the water temperature doesn’t reach the set point, check for clogged filters, stuck valves or sensor faults. Regularly record the pool’s temperature and sunlight conditions to spot trends. Many modern controllers offer remote monitoring with data logging.
Seasonal maintenance schedule
A structured yearly schedule helps ensure you don’t miss important tasks. Gomez Roofing’s maintenance guide recommends the following seasonal actions:
| Season | Maintenance Activities |
| Spring | Flush and clean panels; inspect seals and manifolds; inspect roof penetrations. |
| Summer | Monitor flow rate; adjust collector tilt if adjustable; clean filters more frequently due to heavier pool use. |
| Fall | Treat panels and lines with algaecide; clear leaves from panels; check for early leaf accumulation. |
| Winter | Drain low‑lying lines; insulate exposed pipes; check antifreeze level or drainback functionality. |
Systems in cold climates may need earlier winterization—draining collectors and lines before freezing temperatures. In warm climates with year‑round swimming, winter maintenance may consist only of checking insulation and ensuring freeze sensors are working.
Professional vs. DIY maintenance
Many tasks—such as cleaning panels, inspecting seals and flushing the system—can be performed by the homeowner. Always use proper safety precautions when working on roofs or ladders. However, jobs that involve climbing onto steep roofs, handling antifreeze or doing electrical testing should be left to qualified technicians. Professionals provide:
- Comprehensive inspections using specialized tools like thermal cameras and flow meters.
- Safe cleaning on steep roofs and a full system flush using professional equipment.
- Documented service reports and warranty compliance.
- System tune‑ups that optimize pump settings and sensor calibration.
By contrast, do‑it‑yourself maintenance offers cost savings and familiarizes you with your system. Many homeowners handle monthly and quarterly cleaning, small leak repairs and valve checks while scheduling professional service annually or when problems arise.
Troubleshooting common issues
The system isn’t heating the pool
- Dirty panels or filters – if panels are covered in dirt or the filter is clogged, clean them.
- Insufficient flow – check pumps and flow valves; adjust or replace if necessary.
- Controller issues – sensors may be misreading temperatures or controllers may be faulty.
Uneven or low panel temperatures
- Shading – new tree growth or rooftop objects may be shading part of the array.
- Scale buildup – flush the collectors with a mild acidic solution to remove mineral deposits.
- Air in the system – bleed air vents or ensure proper slope so air doesn’t block circulation.
Leaks or drips
- Loose fittings or cracked seals – tighten fittings or replace worn O‑rings.
- Damaged collector seams – patch or replace damaged sections; many flexible panels allow sectional replacement.
Overheating and pressure relief discharge
- Pump running during low demand – adjust controller set points so the pump shuts off when the pool is warm.
- No drainback – ensure drainback tank or solenoid valve is functioning so that fluid can return to storage if overheated.
Freezing damage
- Sensors not draining collectors – confirm freeze sensors are installed and working.
- Improper slope – verify collectors slope at least 0.25 inches per foot to allow complete drainage.
Annual Solar Pool Heater Checklist
- Inspect collectors for shading, dirt, cracks and leaks.
- Clean panels with a soft brush and mild soap.
- Check pumps, valves, controllers and sensors.
- Flush the system to remove scale and debris.
- Inspect seals, insulation and roof mountings.
- Winterize or add antifreeze where freezing occurs.
Conclusion
Solar pool heaters provide warm pool water using free sunlight. To keep them operating efficiently, you need to perform a few simple yet important tasks: clean and inspect the collectors, maintain proper water flow, inspect pumps and valves, protect against scaling, corrosion and freezing and schedule periodic professional inspections. Regular maintenance not only prolongs the life of your system but also maximizes energy savings and ensures comfortable swimming throughout the season. By following this annual checklist and keeping an eye on system performance, you can enjoy warm swims and peace of mind for many years to come.

Lee Fondiller is a seasoned operations executive with over 20 years of experience in technology and sustainability. As COO of Solar4Pools, he leads innovation in the renewable energy industry with a focus on solar-powered solutions.