
Your solar pool heater is a fantastic investment, silently harnessing the sun’s power to extend your swimming season and keep your pool at that perfect, inviting temperature. It’s an eco-friendly and cost-effective marvel of engineering. But what happens on that frustrating day when you dip your toes in, expecting warmth, and are met with a disappointing chill? Before you start seeing dollar signs and dreading a call to a pool technician, take a breath. Many common solar pool heater issues are surprisingly straightforward to diagnose and fix yourself. This guide is designed to empower you, the pool owner, to become your own first line of defense. We will walk through the most frequent culprits behind a malfunctioning solar heater, from simple flow problems to pesky leaks, and provide you with clear, step-by-step DIY solutions to get your system back up and running, soaking up those free rays of sunshine.
The Primary Suspect: Why Isn’t My Pool Getting Warm?
This is the number one complaint from solar pool owners, and it can stem from a variety of sources, many of which are simple to resolve. When your pool isn’t heating, your first instinct should be to investigate issues related to water flow and system controls. The problem is rarely with the solar panels themselves but rather with the supporting equipment that gets the water to and from them.
Investigating Water Flow: The Lifeblood of Your System
Your solar heater works by circulating pool water through the collectors on your roof. If that circulation is weak or blocked, the system cannot transfer heat effectively. Think of it as a traffic jam on the heat highway. The most common cause of poor water flow, accounting for a staggering 80% of heating issues, is a dirty or clogged filter When your filter is packed with debris, it restricts the pump’s ability to push water with enough force to reach the roof and cycle through the entire system. Before you do anything else, check your filter pressure gauge. If it’s reading 8-10 PSI above its clean starting pressure, it’s time for a cleaning or backwashing. A clean filter often restores the necessary flow and magically brings your solar heater back to life.
Another frequent offender is the pump basket. Leaves, twigs, and other debris can quickly clog it, starving the pump for water and reducing its output. Make it a habit to check and empty your pump basket regularly, especially after a storm or windy day. Similarly, check your skimmer baskets, as a blockage there will also restrict water flow to the pump.
Sometimes, the issue is with the pump’s settings. If you have a variable-speed pump, ensure it’s running at a high enough RPM to provide adequate flow for the solar system. Pushing water up to a roof requires more power than simply circulating it through the filter. You may need to increase the speed for the hours your solar heater is active. If you’ve cleaned the filter and baskets and checked the pump speed, but the flow still seems weak, you might have an air lock in the system, which we will address later.
Decoding Your Control System and Sensors
Your solar heater’s brain is its electronic controller. This device uses temperature sensors to decide when to send water to the roof. A typical system has at least two sensors: one that measures the pool water temperature (usually near the pump) and one that measures the solar collector temperature on the roof. The controller is programmed to activate the system only when the collectors are a certain number of degrees warmer than the pool water, ensuring you are always adding heat.
If your controller or sensors are faulty, the system may not turn on even on a bright, sunny day. First, perform a simple visual check. Is the controller powered on? Many systems have a toggle switch on the solar valve actuator that can be accidentally bumped or turned off by a pool service technician Ensure it’s in the “Auto” or “On” position. Check the controller’s display for any error codes. A common error message indicates a faulty sensor. According to experts at Supreme Heating, a simple way to diagnose a bad sensor is to swap the pool and roof sensor connections at the controller. If the error message changes (for example, from “Roof Sensor Fault” to “Pool Sensor Fault”), you’ve confirmed that one of the sensors has failed and needs replacement
Sensor placement is also critical. The roof sensor must be located in direct sunlight, near the solar panels, to get an accurate reading of the available solar energy. If it has fallen off or is shaded, the controller won’t know that it’s a good time to heat the pool. Likewise, the water sensor needs to be properly submerged in the plumbing to read the pool temperature correctly. A power outage can also wreak havoc on older, timer-based systems, causing the filtration cycle to run at night when the solar heater is useless. Ensure your pump’s run time is scheduled for the sunniest parts of the day, typically between 10 a.m. and 4 p.m.
The Drip, Drip, Drip: Finding and Fixing Leaks
Seeing water dripping from your roof or a perpetually wet spot in your yard is alarming. The good news is that most solar pool heater leaks are minor and can be repaired with basic tools and inexpensive parts. It is crucial to address leaks promptly, as chlorinated or salt water can damage roofing materials over time.
Locating the Source of the Leak
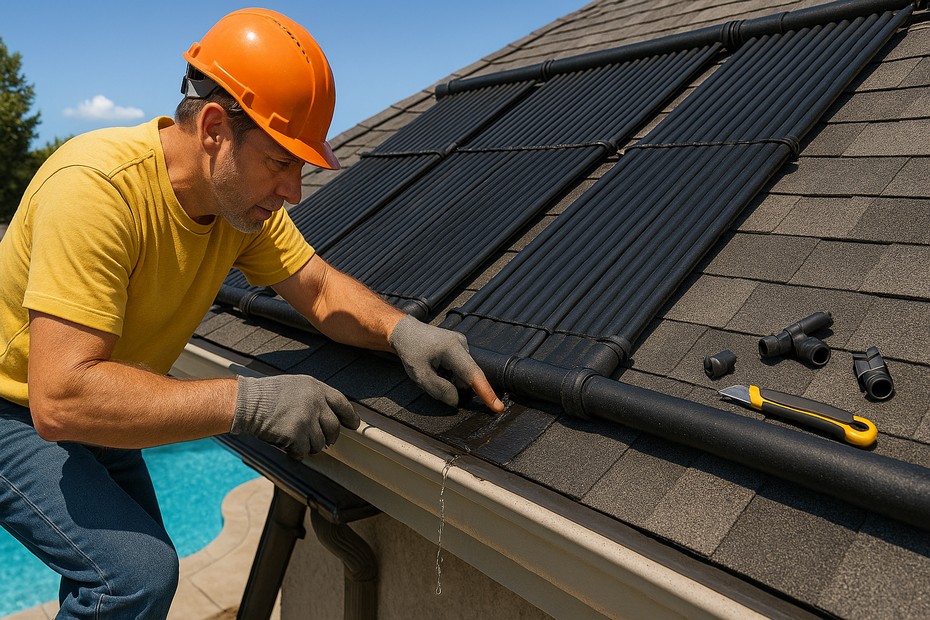
First, you need to become a detective. The location of the leak will tell you what kind of repair is needed. Run your solar system to get water flowing, which will make the leak easier to spot. Carefully and safely get a vantage point where you can observe the solar collectors, the manifold pipes they connect to, and the plumbing running up and down the roof.
Leaks most commonly occur in three places:
- The Solar Collectors (Absorbers): These are the individual tubes or panels that make up the main body of your solar array. Leaks here are often small pinholes or cracks.
- The Manifolds: These are the larger pipes at the top and bottom of the array that distribute water to and from the collectors. Leaks often happen where the small collector tubes connect to the manifold.
- The Plumbing Connections: This includes the PVC pipes and rubber hose connections that link the panels together and connect the system to the main pool plumbing.
DIY Leak Repair: A Step-by-Step Guide
Once you’ve found the leak, you can proceed with the repair. For any work on the system, it’s best to turn the solar controller off to stop the flow of water to the roof.
Repairing a Leak in a Collector Tube: If you have a leak in one of the small individual tubes of a strip-style collector, you don’t need to replace the whole panel. You can simply bypass that single tube. Sunlover Heating provides a clear DIY method for this common repair.
- Isolate the Tube: Using a utility knife, carefully cut down the ridge that connects the leaking tube to its neighbors on both sides. You only need to separate a few inches of the tube above and below the leak.
- Cut the Tube: Make a clean cut across the leaking tube above the hole and another clean cut below the hole, removing the damaged section.
- Insert the Connector: You will now have two open ends of the tube. Take a small plastic connector, often called a “barb” or “splicer,” which you can get from a solar supply store. Apply a bit of silicone or PVC glue to the ends of the barb for a better seal.
- Connect the Ends: Firmly push one end of the barb into the upper tube opening and the other end into the lower tube opening, effectively joining them together. Pull the connection tight to ensure it’s secure. The water will now bypass the removed leaky section and continue its path.
Repairing a Leak in the Manifold: The manifold is a more critical component, but repairs are still manageable. Leaks often occur where the small barbs connect the collector tubes to the manifold. Over time, these barbs can become brittle and crack.
- Remove the Broken Barb: If a barb is broken, you’ll need to remove the remaining piece from the manifold. It’s best to use pliers to gently twist and pull it out. Using a knife can damage the manifold itself.
- Install a New Grommet and Barb: The hole in the manifold is sealed by a rubber grommet. Insert a new grommet into the hole. Then, push a new barb firmly into the grommet. This should create a watertight seal.
- Reconnect the Collector Tube: Attach the solar collector tube to the new barb.
For small pinhole leaks directly on the PVC manifold pipe, a plastic welding kit or a specialized PVC patch kit can be used. However, if the manifold has a large crack, it will likely need to be replaced entirely.
Strange Sights and Sounds: What Do They Mean?
Sometimes, your solar heater will give you clues that something is amiss through unusual noises or things you see in your pool water. Learning to interpret these signs can help you catch problems early.
The Bubble Mystery: Big vs. Small
Not all bubbles are a sign of trouble. When your solar system first turns on for the day, it’s normal to see a rush of large bubbles coming from your pool returns. This is simply the water pushing out the air that filled the collectors overnight as they drained. This should stop after a minute or two.
However, if you consistently see a stream of small, champagne-like bubbles the entire time the solar system is running, you have a suction-side air leak. This means air is being sucked into the plumbing somewhere. A common culprit is the vacuum relief valve (VRV) located at the highest point of your solar array. Its job is to open and let air in when the system shuts off, allowing the panels to drain. If it’s not sealing properly when the system is on, it will suck in air, causing those tiny bubbles. This indicates a flow problem – there isn’t enough water pressure to close the valve. The root cause is often a dirty filter, as mentioned earlier If cleaning the filter doesn’t solve it, the VRV itself may be faulty and need replacement.
Thumping on the Roof and Other Noises
If you hear a thumping or rattling sound on your roof, especially during windy conditions, it’s a sign that the straps holding your solar collectors to the roof have become loose. This needs to be addressed immediately. Loose panels can shift, causing damage to the plumbing connections and your roof. A professional service check every 5-8 years is recommended to inspect and tighten all roof attachments
Gurgling sounds in the pipes can also indicate the presence of air in the system, pointing back to a potential air leak or an issue with the system not being able to purge air effectively
Unwanted Guests in Your Pool Water
Have you noticed a fine white powder settling on the floor of your pool? If you have a Diatomaceous Earth (DE) filter, this is a tell-tale sign of a faulty check valve. There should be a one-way check valve installed after your filter that prevents water from flowing backward when the pump shuts off. When the solar system drains, the water flows back down from the roof. If the check valve fails, this back-flowing water can push DE powder from your filter grids into the pool. The check valve will need to be serviced or replaced.
Finding small black specks or flakes in your pool can be more alarming. This could be bits of rubber or plastic from deteriorating components inside the solar system. This often happens to systems that have endured several years of freezing temperatures without being properly winterized. The repeated freezing and thawing can cause the collector material to break down. In this case, a system flush is required, and if the damage is extensive, the collectors may need to be replaced.
Preventive Maintenance: Your Best Troubleshooting Tool
The easiest way to troubleshoot your solar pool heater is to prevent problems from happening in the first place. A simple and consistent maintenance routine will ensure your system runs efficiently for years and will help you spot potential issues before they become major headaches.
Regular Inspection Checklist
Once a month, take a few minutes to perform a visual inspection of your system:
- Check for Leaks: Look for any signs of moisture on or around the collectors, manifolds, and plumbing.
- Inspect the Collectors: Check for any cracks, discoloration, or physical damage from weather or animals.
- Examine the Straps: Ensure the panels are securely fastened to the roof and that the straps are not frayed or broken.
- Listen to the System: When the system is running, listen for any unusual noises like gurgling or thumping. *Check the Valves: Make sure the solar control valve is moving freely and that the check valves are operating correctly.
Keep it Clean
As we’ve established, a clean system is a happy system.
- Clean Your Filter: This is the most important maintenance task. Follow your filter manufacturer’s instructions for cleaning or backwashing.
- Empty Baskets: Regularly empty the pump and skimmer baskets to ensure strong water flow.
- Clean the Collectors: While solar collectors are largely self-cleaning from rain, it’s a good idea to hose them down occasionally to remove any accumulated dust, pollen, or bird droppings that could reduce their efficiency.
Winterizing Your System
If you live in a climate with freezing temperatures, winterizing your solar heater is absolutely critical to prevent catastrophic damage. If your system is designed to drain back automatically every time the pump shuts off, you may not need to do anything. However, if your plumbing has high spots that prevent complete drainage, you must drain the system manually before the first freeze. This involves opening drain plugs and using an air compressor to blow all the water out of the collectors and pipes. If you are unsure, it is always safest to have a professional perform this service.
Quick Fixes for Common Solar Heater Problems
- Why is my solar heater not working?
- Check if the filter is dirty; this is the most common cause.
- Ensure the solar controller is set to “Auto” and has power.
- Verify your pump is running during peak sunlight hours (10 a.m. – 4 p.m.).
- Check for faulty roof or water temperature sensors.
- How do I fix a leak in a solar panel?
- For strip-style collectors, you can cut out the single leaking tube and splice the ends together with a connector barb.
- Why are there small bubbles in my pool?
- This indicates an air leak, likely from a faulty vacuum relief valve on the roof or a bad pump lid o-ring. It’s often caused by a dirty filter restricting flow.
- What if my system makes a thumping noise?
- The straps holding the panels to the roof are likely loose and need to be tightened or repaired to prevent damage.
When to Call a Professional
While many issues are DIY-friendly, some problems are best left to the experts. You should call a qualified solar pool technician if:
- You are not comfortable working on your roof.
- You suspect a major leak in a manifold or multiple collectors.
- You have an electrical issue with the controller or pump.
- The problem persists after you’ve tried the basic troubleshooting steps.
- Your system requires a full flush or winterization that you are not equipped to perform.
A professional has the specialized tools, safety equipment, and experience to diagnose and repair complex issues quickly and effectively, ensuring your system’s longevity and your peace of mind.
By taking a proactive and informed approach, you can confidently manage the health of your solar pool heating system. Understanding how it works and what to look for when it doesn’t is the key to resolving most issues with minimal fuss and expense. A little bit of attention goes a long way in ensuring you get to enjoy a warm, comfortable pool powered by the sun for many seasons to come. So the next time your pool feels a bit brisk, don’t panic. Put on your detective hat, follow these steps, and you’ll likely have the problem solved before the sun goes down.

Lee Fondiller is a seasoned operations executive with over 20 years of experience in technology and sustainability. As COO of Solar4Pools, he leads innovation in the renewable energy industry with a focus on solar-powered solutions.